-
-
FeaturesคุณสมบัติPenyelesaianRecursosFiturCaracterísticas精选功能功能特點المزايا
-
Solutionsโซลูชั่นPenyelesaianSoluçõesSolusiSoluciones解决方案解決方案الحلول
-
IntegrationsการผสานรวมIntegrasiIntegraçõesIntegrationsIntegraciones集成整合服務دمج مع تطبيقات أخرى
-
Affiliate/Partnersพันธมิตร/พันธมิตรทรัพยากรAfiliasi/Rakan KongsiAfiliados/ParceirosAfiliasi/MitraAfiliados/Partners联盟/合作伙伴聯盟/合作夥伴شريك
-
ResourcesจองการสาธิตSumberRecursosSumber dayaRecursosالموارد資源中心

How to Create, Test, and Make a Chatbot Live in Wati
Customers hate waiting. Whether they’re asking a question or making a purchase decision, slow responses can drive them away. But handling every inquiry manually isn’t sustainable.
That’s where chatbots come in. By automating responses, qualifying leads, and engaging users instantly, a chatbot helps your business stay responsive and efficient 24/7.
With Wati, you can set up a chatbot in minutes. This blog will guide you through the process of creating a customized chatbot for your business and making it live.
Why Use Wati’s Chatbot?
✅ Automate Customer Interactions – Save time by handling routine inquiries automatically
✅ Capture Lead Information – Store user responses in a Google Spreadsheet for easy tracking
✅ Enhance Engagement – Provide instant responses and seamlessly guide customers through the sales funnel
How to Create a Chatbot in Wati
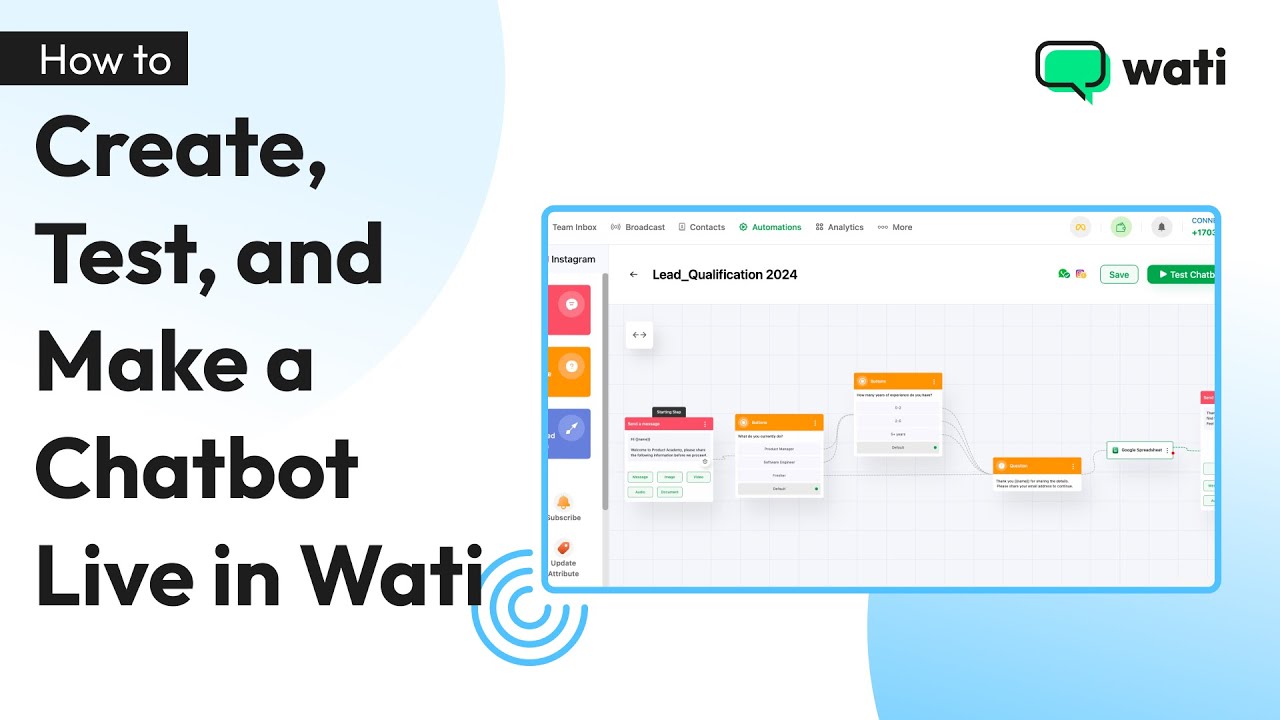
Let’s take an e-learning business as an example and build a lead qualification chatbot!
Step 1: Access the Chatbot Feature
- Log into your Wati account.
- Navigate to Automations from the main menu.
- Select Chatbot and click on Add Chatbot.
- Name your chatbot (e.g., “Lead Qualification 2024”).
Step 2: Configure the Chatbot Steps
- Set Up the First Message
- Choose a variable like {name} to personalize the message.
Step 3: Add Interactive Buttons
- Create a button asking users about their current job role.
- Example options: “Product Manager,” “Software Engineer,” “Fresher.”
- Store responses in a variable (e.g., @currentjob).
Step: 4. Ask About Experience Level
- Add another button to ask: “How many years of experience do you have?”
- Store the response in a variable for further processing (e.g., @experience).
Step 5: Collect Email ID
- Create a question node that requests the user’s email address by asking, “What is your email address?”
- Store it under a variable (e.g., @email).
Step 6: Connect to Google Sheets
- Select Google Spreadsheet as an action.
- Link your Google account and choose a spreadsheet to store responses.
- Map chatbot variables (currentjob, email, etc.) to specific spreadsheet columns.
- Save the configuration.
Step 7: . Finalize the Chatbot
- Add a final message thanking the user.
- Optionally, attach a document (e.g., a brochure or guide).
- Save the chatbot.
You have successfully launched your chatbot!
How to Test Your Chatbot
You can easily test your chatbot in Wati. To do so,
Step 1: Click on Test Chatbot inside Wati.
Step 2: Scan the QR code or send a message to your WhatsApp number.
Step 3: Monitor responses in the Team Inbox.
Step 4: Verify if the responses are recorded correctly in your Google Spreadsheet.
Your chatbot is ready! Continue reading to understand how you can make your chatbot live.
How to Make Your Chatbot Live
Step 1: Go to Rules.
Step 2: Click on Create Rules.
Step 3: Select Show triggers for and choose Incoming Messages.
Step 4: Name your rule and add your keyword in the Filter option (e.g., “Hi”). Keywords are mandatory in chatbots as they trigger the right responses and automate conversations effectively.
Step 5: Select the action type as Chatbot and choose the chatbot you created – Lead Qualification 2024.
Step 6: Save the changes to make the chatbot live.
Once live, your chatbot will automatically handle inquiries, capture leads, and store responses efficiently. With Wati’s chatbot, you can enhance customer engagement and automate repetitive tasks seamlessly.
Ready to automate your customer interactions? Try Wati’s chatbot today!
Latest Comments