-

-
-
FeaturesคุณสมบัติPenyelesaianRecursosFiturCaracterísticas精选功能功能特點المزايا
-
Solutionsโซลูชั่นPenyelesaianSoluçõesSolusiSoluciones解决方案解決方案الحلول
-
IntegrationsการผสานรวมIntegrasiIntegraçõesIntegrationsIntegraciones集成整合服務دمج مع تطبيقات أخرى
-
Affiliate/Partnersพันธมิตร/พันธมิตรทรัพยากรAfiliasi/Rakan KongsiAfiliados/ParceirosAfiliasi/MitraAfiliados/Partners联盟/合作伙伴聯盟/合作夥伴شريك
-
ResourcesจองการสาธิตSumberRecursosSumber dayaRecursosالموارد資源中心
How to Use Wati’s Instagram DM Automation
Instagram has become a powerful tool for businesses, but the growing volume of direct messages (DMs) can overwhelm your team. Missed inquiries, delayed responses, and ignored leads result in lost sales and dissatisfied customers.
Wati’s Instagram DM Automation solves this by automating responses, ensuring every message receives a timely reply. This helps you convert more leads, close additional sales, and increase revenue—effortlessly.
In this blog, you’ll learn how to set up Instagram automation in Wati, including connecting your Instagram account, automating welcome messages for new customers, and setting up out-of-office responses.
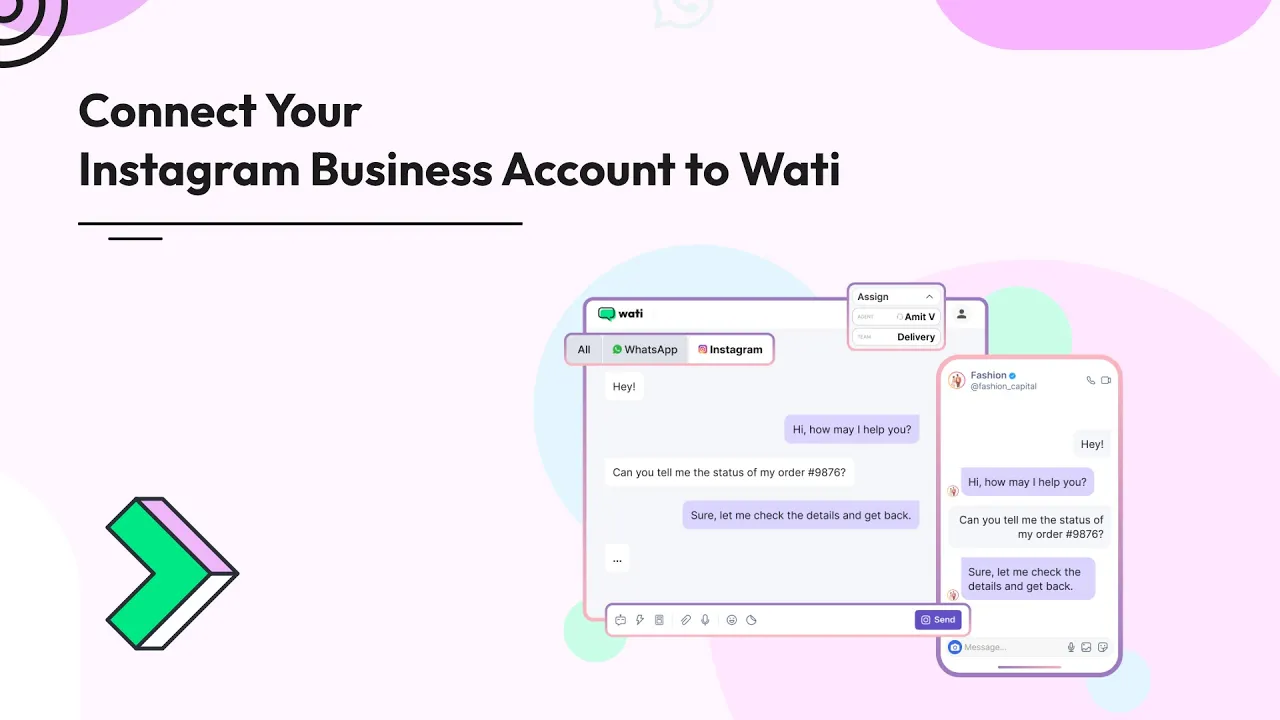
Connect Your Instagram Account with Wati
Follow these simple steps to connect your Instagram account with Wati:
1. Go to Your Profile: Open your profile and select Channel Status.

2. Click the Instagram Tab: Scroll down and click the Get Started button.

3. Answer the following Questions:

- Do you have an Instagram professional account?
- If not, follow the provided steps to create one.
- Is your Instagram account linked to your Facebook page?
- If not, follow the steps to link it.
- Is message access enabled on your Instagram professional account?
- If not, follow the steps to enable it.
Click on “Yes” to get started with the process.
4. Connect Instagram: Click on the Connect Instagram button to proceed. This will redirect you to the Facebook login page.

5. Log In to Facebook: Enter your Facebook account details and click Login.

6. Continue with Your Profile: After logging in, continue with your profile. A new tab will open for the Instagram login page.


7. Enter Your Instagram Details: Quickly enter your Instagram account details and click Login.

8. Select Your Business: Choose the business you want to link to your Instagram account. Select the business you’re currently working with.


Once you complete these steps, Wati will connect to your Instagram account. You can now use Instagram DM automation to handle messages and stay connected with customers.
Set Up an Automated Welcome Message for New Customers
Setting up an automated welcome message lets you greet new customers instantly without manual effort. Here’s how to set it up:
Steps to Set Up the Welcome Message Automation:
1. Go to Reply Material: Navigate to Reply Material in the Automation menu to create the response you want to send to new customers. Choose text, image, or video. For this example, use text.

2. Create the Response:
- Click Add to create new content.

- Name the material Welcome Message and input the content you want to send.
- Click Save.

3. Create a Workflow:

- Click on Create Rules to create the workflow for this automation.

- Set the trigger to “Incoming Message” and for “New Instagram Message is Received.”

- You can name the flow as Welcome Message.
4. Set Up the Filter:
For the Filter, select On Contact Who Does Not Exist. This ensures that Wati will only send the automated message to new customers who haven’t messaged your business before.

5. Select Message Type:
- Choose Text for the message type, as you created the welcome message in text format.
6. Choose the Material:
- Select the Welcome Message you saved earlier in the Reply Material section.

7. Save the Workflow:
- After reviewing all the settings, click Save.

Once you complete these steps, Wati will automatically send the Welcome Message to any new customer who messages your business for the first time. The message will go out without any manual effort on your part.
Set Up an Automated Out-of-Office Message Response
You can set up an out-of-office message to let customers know when you’re unavailable, similar to a Welcome Message. Here’s how:
1. Go to Reply Material: Start by navigating to Reply Material to create the response. Choose text, image, or video. For this example, use text.

2. Create the Response:
- Name the material Out-of-Office Message.
- Add the content you want to send.
- Click Save to store the response.

3. Create a Workflow:
- Click on Create Rules to create the workflow for this automation.
- Set the trigger to “Incoming Message” and for “New Instagram Message is Received.”
4. Set the Filter:
- You can name the flow as Out-of-Office Message.
- For the Filter, select Timestamp is not within the working hours. This ensures the automated response only sends during non-working hours.
5. Choose Message Type:

- Choose Text as the message type because you created a text-based response earlier in Reply Material.
6. Select the Material:
- Select the Out-of-Office Message you saved earlier.
7. Save the Workflow:
- After confirming the settings, click Save.

Once you complete these steps, Wati will automatically send the Out-of-Office Message whenever a new message is received outside of your working hours.
By following these steps, you can set up Instagram DM automation and ensure your customers get timely responses—whether you’re welcoming new customers or letting them know you’re unavailable. With Wati, you can streamline your messaging, improve customer experience, and save valuable time.
Latest Comments